Loading samples
A word of warning: I may write mobile trackers in my spare time, but I'm rather musically illiterate, at least when it comes to producing music. So, this is not meant to be composing class, this is meant to explain how to track with NitrousTracker.
Warning (2): Make sure that the filesystem of the memory card is consistent by checking with scandisk/fsck! Sometimes, when NDS apps write to the card, the filesystem gets corrupted although you won't realize. When saving to a corrupt filesystem you may loose your work!
First of all, we need samples. We all like retro sound, so we use this nice LSDj sample pack from the Freesound project kindly provided by starpause. Download the pack and unzip it to a new folder on your card. Then put it into your DS and start NitrousTracker.
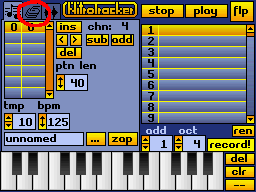
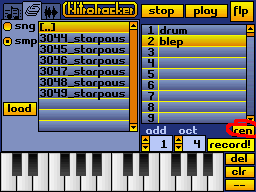
To load some samples, click on the hard disk icon.
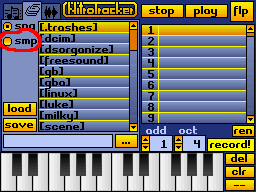
Then select "smp". This will cause that only samples are displayed in the browser.
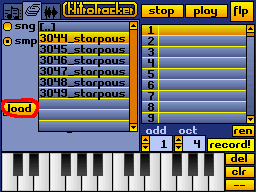
Now go to the folder where the sample pack lies. When you load a sample, it is loaded into the currently selected intrument bank, i.e. the highlighted item in the list on the right. Make sure, the first item is selcted, then tap on the file starting with "3044" and tap "load".
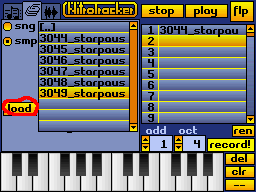
Now select the second sample bank and the sample starting with "3049" and tap "load" again.
You can play around on the keyboard to listen to the samples. Since their names are not very descriptive, you might want to rename them.
To do this, press the "ren" button under the instrument list and enter the new name with the typewriter that appears. (I use the old-fashioned term typewriter to differentiate the (computer) keyboard from the (musical) keyboard.)
You can record your own samples through the internal microphone as well as through a microphone connected to the mic jack. Sadly, Nintendo chose to make the microphone jack proprietary, so you'll have to go with one of the available DS headsets found in most retail stores. If you feel adventurous you can also try slaughtering such a mic to connect a better microphone, but be warned: Some people who tinkered with the mic jack reported that their DS microphone stopped working completely!
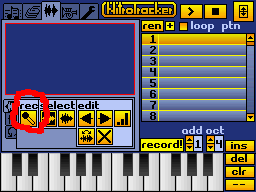
To record a sample, select an empty instrument on the right, then go to the sample tab and tap the microphone button.
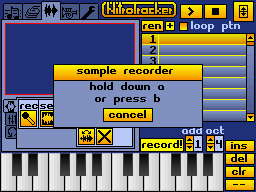
There are two recording modes:
- Quick recording: Press and hold A
- Hands-free recording: Push B to start, and push B again to stop
To review what you recorded, select octave 4 in the "oct" number box on the lower right of the screen, and then press and hold the leftmost keyboard button. This will play back your sample at the note C-4, which is the original recording frequency. After cutting and normalizing your recorded sound, you'll have a brand new instrument!