Editing instruments
Trackers are stupid. They just play back samples at different pitches so we think we are hearing instruments playing different notes. Of course we cannot be fooled that easily, because we notice that a sample sounds artificial when played back at a too high or too low pitch. Also, when samples are played at higher pitches, they get shorter. On the other hand, when we play a real instrument, like the piano or the violin, we can adjust length, pitch and several other properties of it's sound. To narrow the gap between real world instruments and pure samples, trackers have the concept of instruments. This section describes how to use the power of (tracker) instruments to make your songs sound more like they are played by (actual) instruments.
To overcome the problem that a high pitched sample sounds artificial and the problem that the length of a sample changes with it's pitch, you can use multiple samples in the same instrument and assign these to individual notes. For example, you could have one sample for each octave. This won't make your instrument sound perfect, but at least way closer to the original than it would sound with only one sample.
To use this technique, you first need multiple samples of the same instrument, recorded at different notes (for example c-3, c-4, c-5 and so on). I'll only demonstrate this on two samples of a string. You can try it yourself by grabbing this set of [bass samples]/nitroustracker/(content/instruments/bass.zip) from the Open Path Music Library. Copy your samples to your card, fire up NitrousTracker and go to the file browser.
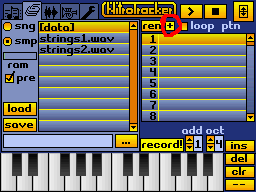
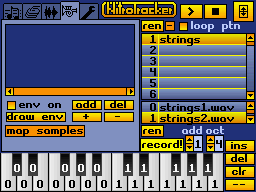
Now, press the "+" button above the instrument list. This will unfold the instrument and you'll see a second list below the instrument list, which is the list of samples. The number on each key denotes the sample that is mapped to it. Later we'll see how to edit this mapping.
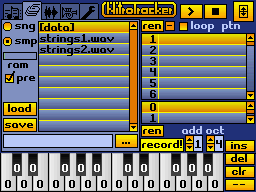
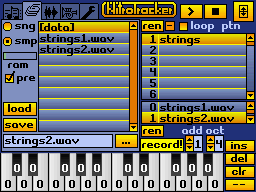
Load the samples into the instrument's sample slots. To do this, select the first slot, load the first sample, select the second slot and load the second sample and so on.
You can assign samples to the next higher octave by pressing the up arrow on the "oct" box
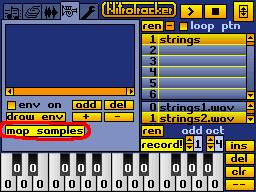
Now go to the instruments tab by tapping the trumpet icon and then tap "map samples"
Now, if you press a key on the keyboard, you assign the currently selected sample to it. Select the second sample and press all the keys of the second octave on the keybaord such that it looks like this:
Now, press "map samples" again to leave the sample mapping mode. You can collapse the instrument again by pressing the minus "-" button above the instrument list. The sample mapping will not get lost. Now, play a tone ladder to hear if your instrument sounds natural.
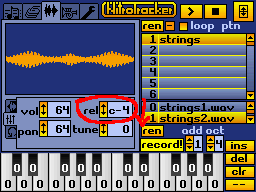
Maybe you will notice that the samples on the upper octave are much too high. This is because NitrousTracker uses the same base octave for all your samples. We need to tell it that our second sample is one octave higher than our first one by lowering the relative note by one octave. To do this, select the second sample (nr. 1) of the instrument, then tap the sample tab on top, then the sliders tab below the sample preview and decrease the "rel" note by one octave. If you now play the tone ladder again it should sound fine.
Repeat this for our third bass sample as well, and you should have a nice sounding bass instrument. For comparison, select another instrument slot and load the first bass sample into it. Now try playing a high note such as G-6 and you'll hear the difference. For reference, here's the XM with the finished instrument.
Envelopes are the perfect addition to sample looping: With loops you can extend the length of your samples, and with envelopes you can make the looped samples sound natural again. This is done by applying a hull curve to the instrument volume, i.e. a curve that defines the amplitude of your instrument at each point in time.
Time to apply your knowledge about loops! Let's start off where we were in the multi-sample tutorial. (If you didn't read it you can just grab the ready-made XM from here.) For each if the three samples in our bass instrument, find a loop that sounds good. Ping-pong loops usually work best. Remember that the samples are only played with the keys you assigned them to, so to listen to your loops be sure to use the right keys.
Now your samples will play as long as you hold the key, but they will sound unnatural again because they keep the same amplitude. To fix this, go to the instrument (trumpet) tab. The box you'll see there is the envelope editor. To create an envelope, press "draw env".
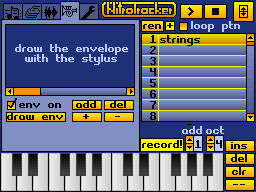
Now try to draw something like this:

You can edit the envelope afterwards by dragging the points with the stylus. Using the "add" and "del" buttons you can add more points or delete them. Using "+" and "-" you can zoom in or out.
Play with the volume envelope to see how it changes the sound of the sample.
For reference, here's the XM with the finished instrument.