Editing effects
Jump to:
As of version 0.6.0, NitrousTracker features an input method for XM effects.
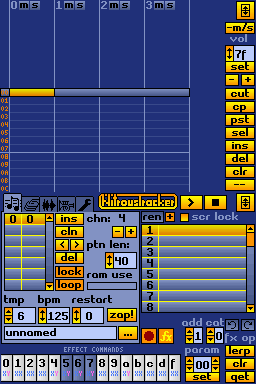
Press the button marked ‘fx’ ( ) to show or hide the effects keyboard.
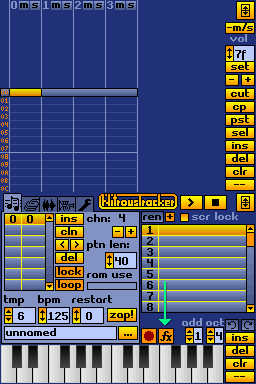
You’ll notice the piano has been replaced with a row of buttons and some extra widgets, and additionally, that the channels displayed on the top screen have become wider. This is to allow enough room to display the effect command and parameter on the right of each note.
Let’s go over each part of the effect keyboard, starting with the category selector.

Note that the octave selector now says “cat”. You can use these to flip between different categories of effects, described below.
cat number | Category name | Description |
|---|---|---|
| 0 | Standard effect commands | The “standard” set of effect commands, which can also be seen in ProTracker. Note that the usage / implementation of these commands differs from their original implementation in ProTracker. |
| 1 | Exy subcommands | An extra set of commands which use ‘E’ as the base command, and specify a subcommand using the first digit of the parameter. |
| 2 | FT2 commands (extended commands) | Additional XM-only commands introduced by FastTracker II. |
| 3 | Volume column commands | Commands which can be optionally entered into the volume column of a note, instead of the effects column, which allows for two commands to be used at once. A lot of these are simply mnemonics for existing commands. Note that as of version 0.6.3, NitrousTracker doesn’t support these yet. |
Let’s move on to the button area.
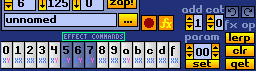
Until you press one of the effects buttons, this text will initially describe the current ‘category’ being displayed (more on categories later). Pressing an FX button, however, will display a brief description of what the effect does. Whether or not an effect is recorded into the pattern depends on whether you’re in recording mode.
If you’d like to browse what each effect does, you can press the various FX buttons when you’re not in recording mode to display a description of that effect. Again, effects will only be committed to the pattern if you’re in recording mode.
Let’s move on to the buttons.
Note that greyed out keys represent effects that aren’t implemented1/playable by NitrousTracker’s playback engine, and therefore are disabled from being entered into the pattern. You can still view their description by tapping them.

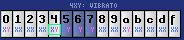
The number or letter in black at the top of the button is the effect command that’ll be entered into the pattern.

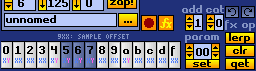
The small text beneath, “XX” / “XY”, represents the format of the effect command’s parameter. For instance, the sample offset command, 09XX, takes a single parameter that ranges from 0 to FF (in hexadecimal). It follows that the command 0908 will cause the note to start playing 8 units2 from the beginning of the sample.
The effect parameter format “XY” means the effect command has two different numbers that are split into two different ‘sub-parameters’. In the case of vibrato (04XY), the X (the tens (sixteens?) digit of the parameter) determines the vibrato speed, and the Y (units digit) determines the depth.
Since the parameter is split into two digits, in “XY” effect commands, you’ll only have a ‘resolution’ of 16 different values (0 to F) for each sub-parameter.

The effects parameter editor looks like the other number editing widgets in NitrousTracker, but there’s an extra pair of arrows on the left side. This allows you to edit each digit of the effect parameter independently of each other.

If you’re in the “E commands” category, then you’ll only see one digit, and the left pair of arrow buttons will be disabled. This is because “E commands” reserve the first digit of the parameter to determine which command to use.


You can also make adjustments by sliding, however might find it harder to slide down, due to the limited screen real estate below the parameter slider.

The effect parameter wraps around upwards or downwards when using the arrows.
Tip: for a (hacky) way to get back to 00 quickly, you can either press “get” over a note without an effect parameter, or quickly slide up to ff, and then press the top-right arrow to wrap back around to 00.


There are three buttons here which replace ins, del, clr, and --, whilst you are in effects mode. Let’s go over each of them.
The lerp button will fill in (interpolate) the values between two effect commands if you make a selection. A common use-case for this is to manually timestretch samples by entering the note many times and “playing” it at the desired speed using the 9xx command.
Note that unless you’re in effects editing mode, selections you make do not persist when you switch screens. Make sure you’re in FX mode before making a selection to lerp.
Removes the effect command and effect parameter from the current selection, or from the note under the cursor if there is no selection.
Copies the effect parameter from the note directly under the cursor to the param box.
If used on a note with no effect parameter, 00 will be copied.
See Effects FAQ to see if there’s an answer to any questions you might have in there.
For a list of which effects are implemented, see: Implemented effects ↩︎
If you’re familiar with ProTracker, note that in FastTracker II modules, the sample offset command does not use a unit of 1/256th of the sample’s length. Instead, the sample offset parameter uses a fixed offset, so you might have longer samples that aren’t fully addressable by the offset command. ↩︎